SiteApex Administration Help & Tutorials
Please use the topic links below to see a list of tutorials for that particular topic or module. Or you can use the search button to search for help on a specific topic.
Note: there are a few non-default modules listed here. Please contact sales if you are interested in any of these modules.
- Getting Started
- Page Editing
- Ad Manager
- Blog Module
- Bulletin Board (BBS)
- Calendar Manager
- File Manager
- Form Builder
- League Module
- Media & Resource Library
- News Letters
- News Manager
- Photo Album
- Staff List
- Shopping Cart
- Directories Module
- Indexed Articles
- Questionnaires
- Job Posting
- Mobile Devices
- Control Panel
- SMTP - Outgoing Mail
- Security & User Groups
- Templates
- Plugins
- SEO
- WCAG / Website Accessibility
Adding & Editing Security Groups
SiteApex Security groups are a key component of creating security on your website.
- Allows password-protected page security by selecting which group(s) of users can log in
- Create custom group(s) of users that could log into make site edits or manage a certain administration task like adding Calendar events or managing Forms
- Use groups to store your marketing mailing list and send to these groups using the Newsletter module
Security Management
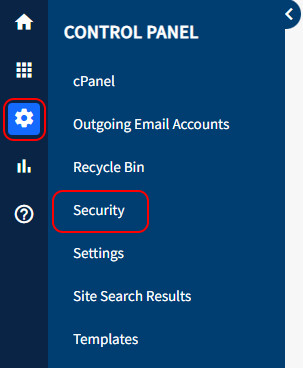
Security Users are managed under the Control Panel ![]() and Security menu item.
and Security menu item.
Security privileges are assigned to a Group and not to the individual User. Once a User is assigned to a Security Group they are given the security privileges of that group. An individual User can belong to more than one Security Group and thus have privileges of all the Secure Groups they belong to.
Adding a Security Group
- Head to Security > Groups in the main menu.
- Click on the +Add Group button across the top.

- Give your new group a name and assign editing privileges to the group if required. No additional items required if this group is only for logging into a front end secured page.
- You can select users for the group from the list at the bottom. Users can also be added to the group using the User edit screen.
- Press Create Group to save and create the group.
Security Privileges
Privileges are divided into two categories: High and Low. This division of privileges helps the administrator understand the scope of the privilege when assigning items. High-level items apply to the website admin area. Low-level items apply only to the specific area (webpage, function, etc.) shown.
Assigning low-level items enables the administrator to assign restricted privileges to very specific areas of the website. For example, one group could be assigned the privilege of editing only one page of the website and nothing more.
Editing a Security Group
- In the main menu hover over Control Panel
 > click on Security > Click on Groups in the top right corner.
 - Find the Group you want to edit and click the Edit next to it.
- Make any changes to the group.
- Click Save Changes at the bottom to save your updates.
In the main Group list, you can also delete Groups by pressing the Delete. It is not recommended to delete the default SiteApex groups.